

How to Dig Fence Post Holes with a Mini Excavator and Hydraulic Auger
Installing a fence can involve a lot of repetitive and physically demanding work, particularly when dozens of post holes need to be dug through hard-packed soil, clay, tree roots, or rocky terrain. Digging each hole manually can take considerable time and effort.
When only a few fence posts are involved, hand digging may be a reasonable option. However, larger fence projects can become much more time-consuming, especially when ground conditions are difficult. A mini excavator equipped with a hydraulic auger can greatly reduce manual labor while helping operators create holes with more consistent dimensions.
A hydraulic auger uses the excavator's hydraulic system to power the drilling process. Combined with the compact footprint and maneuverability of a mini excavator, this setup is useful for residential fencing, farms, landscaping work, property improvements, and other projects where full-size equipment may be impractical.
Why Use a Mini Excavator for Fence Installation?
- Faster post-hole drilling – Hydraulic-powered drilling can speed up repetitive hole digging compared with manual methods.
- More consistent holes – Using the correct auger bit allows operators to produce holes with relatively uniform diameters and depths.
- Reduced manual effort – The machine provides the digging force, reducing the amount of strenuous hand labor required.
- Improved access in tight spaces – Mini excavators can maneuver through residential yards, narrow work areas, and other locations where larger equipment may have difficulty operating.
- Suitable for various ground conditions – Different auger bits, teeth, and configurations can be selected according to whether the ground contains loose soil, compacted clay, roots, rocks, or other difficult materials.
Choose the Right Mini Excavator and Auger Attachment
Before beginning a fence installation project, confirm that the mini excavator and hydraulic auger are properly matched.
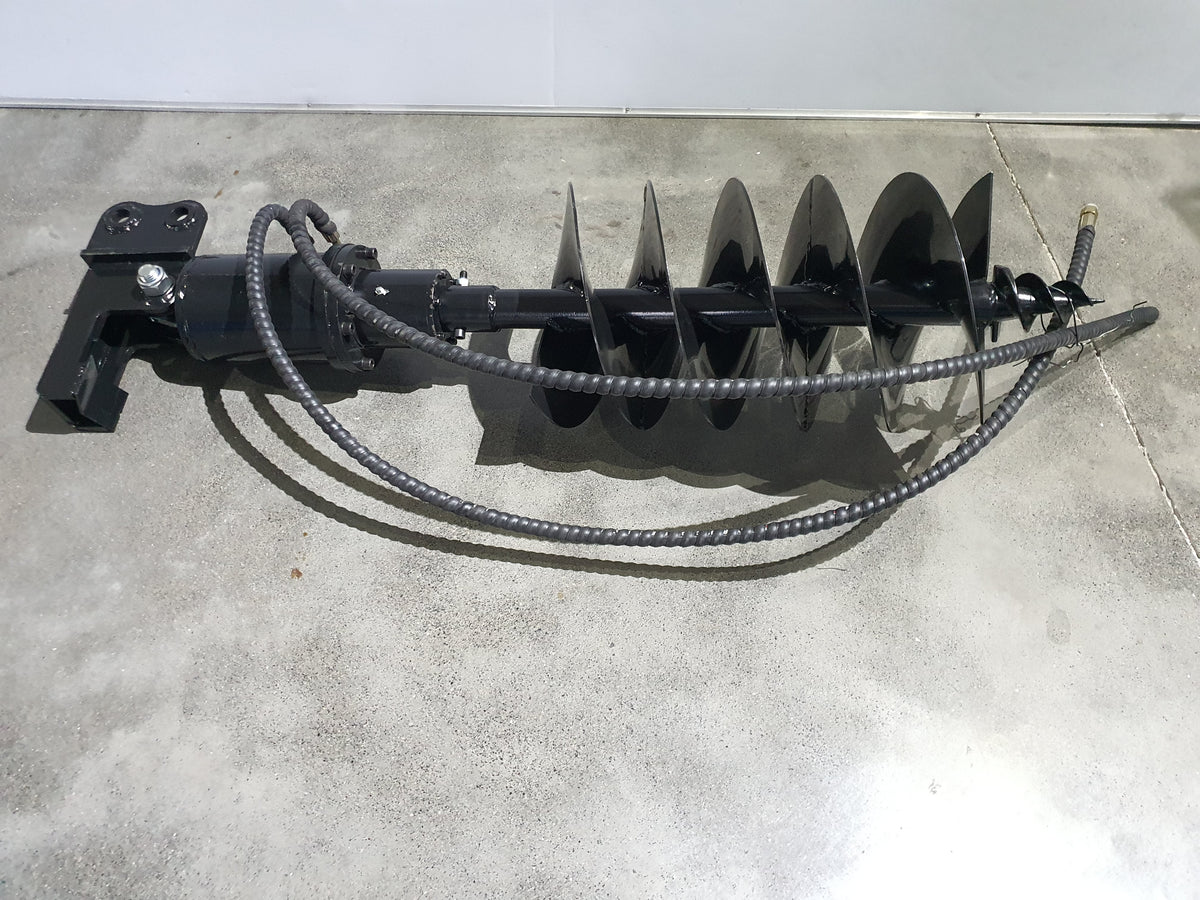
The excavator must provide adequate auxiliary hydraulic flow and pressure for the selected auger drive. The attachment's mounting interface must also be compatible with the excavator.
Selecting the correct auger bit is equally important. Bit diameter directly affects the approximate diameter of the finished hole. Instead of automatically selecting the largest available bit, choose a size based on the fence post dimensions, required hole size, soil conditions, and installation requirements.
Plan and Mark the Fence Line
Proper preparation is an important part of successful fence installation. Before bringing the excavator into position, determine the fence layout and clearly mark every post location.
Use stakes, marking paint, flags, or another highly visible method to identify:
- Corner posts
- Gate posts
- End posts
- Line posts
- Points where the fence changes direction
Carefully measure the distance between each post location. Proper spacing is essential for ensuring that fence panels, rails, wire, and other components fit as intended.
Taking the time to establish an accurate layout before drilling can prevent costly corrections later in the project.
Position the Mini Excavator
After marking the fence line, position the mini excavator so the boom and auger can reach as many marked locations as possible without unnecessary repositioning.
Before drilling:
- Park the machine on firm and reasonably level ground.
- Align the excavator with the fence layout.
- Position the boom above the marked post location.
- Keep the auger as close to vertical as practical.
- Make sure workers, bystanders, and obstacles are outside the operating area.
Proper machine positioning helps maintain straighter holes and minimizes unnecessary movement.
One advantage of a mini excavator is the ability to make precise adjustments with the boom and hydraulic controls. This allows the operator to accurately position the auger without having to move the entire machine for every small correction.
Connect the Auger and Hydraulic Lines
Install the hydraulic auger according to the instructions provided by the excavator and attachment manufacturers.
Before starting the machine, inspect the mounting connection and hydraulic system. Make sure all hydraulic hoses are securely connected and routed away from sharp edges, moving components, and potential pinch points.
Never operate the auger if the attachment is not securely mounted or if the hydraulic connections and required safety controls have not been properly installed.
Start Drilling the Fence Post Hole
Once the auger is centered over the marked location, engage the hydraulic rotation and slowly lower the bit into the ground.
The general drilling sequence is:
Position → Start rotation → Lower gradually → Drill → Raise and remove spoil → Continue
Avoid pushing the auger into the ground with excessive force. Allow the cutting teeth and hydraulic drive to penetrate the material at a controlled rate.
In ordinary soil, controlled rotation combined with steady downward movement can help maintain a straight hole.
When working through compacted clay, roots, or rocky material, use an auger and tooth configuration appropriate for those conditions. Excessive downward pressure can increase the risk of the bit becoming stuck or binding in the ground.
Hydraulic augers are available in different configurations for different applications, including standard earth augers, heavy-duty models, and options designed for harder materials such as rock or frozen ground.
Clear the Soil as You Drill
Another important part of auger operation is managing the material removed from the hole.
Rather than continuously drilling deeper while allowing the auger to become overloaded with soil, periodically raise the bit to remove accumulated material from the hole.
The exact procedure can vary depending on the auger design, soil conditions, and manufacturer recommendations. Always follow the attachment manufacturer's operating instructions, particularly when drilling through rocky, unstable, or difficult ground.
Check the Hole Depth and Diameter
Once the required drilling depth has been reached, stop the operation and inspect the hole.
Verify that the hole:
- Reaches the required depth
- Has an appropriate diameter for the post
- Provides enough room for concrete or backfill when required
- Is positioned correctly along the fence line
- Is sufficiently straight
Hole dimensions should be based on the fence design, post specifications, soil conditions, and applicable local requirements.
Creating a consistent series of properly positioned holes can make the rest of the fence installation much easier and help produce a more uniform finished fence.
Install the Fence Posts
After the holes have been prepared, place the fence posts into their respective locations.
Corner posts, gate posts, and other structural posts may require additional support or a different installation method depending on the fence design.
Before concrete or backfill is allowed to set, check each post for:
- Vertical alignment
- Correct height
- Proper spacing
- Correct orientation
A level, string line, laser level, or similar layout tool can help maintain a straight and consistent fence line.
Backfill and Finish the Fence Line
Once each post has been properly positioned, backfill the holes according to the requirements of the fence system.
If concrete is being used, allow it to cure for the appropriate amount of time before subjecting the posts to significant loads or installing components that could place stress on them.
After the posts are securely installed, continue with the remaining fence components, such as panels, rails, wire, or gates.
Choosing the Right Auger Bit for Different Jobs
The ideal auger bit depends on several factors, including the post size, required hole diameter, drilling depth, soil conditions, and hydraulic capabilities of the excavator.
| Application | Typical Consideration |
|---|---|
| Residential fence posts | Small to medium standard-earth auger |
| Large wood posts | Larger-diameter auger bit |
| Corner or gate posts | Larger hole may be necessary depending on the fence design |
| Livestock fencing | Smaller-diameter bit may be adequate |
| Rocky or root-filled soil | Rock-capable bit or specialized teeth with an appropriate high-torque setup |
| Deep structural posts | Properly sized bit with an approved extension when applicable |
There is no universal auger size that is suitable for every fencing project. The bit should be selected according to the actual post dimensions, required hole specifications, ground conditions, and equipment capabilities.
Mini Excavator Fence Installation: Common Mistakes to Avoid
1. Using the Wrong Auger Size
Selecting an auger that is too small may leave insufficient space around the post for the required backfill or concrete. On the other hand, an unnecessarily large bit can create excessive spoil and may not be appropriate for the intended post installation.
Choose the bit according to the actual requirements of the fence project rather than simply choosing the largest available option.
2. Ignoring Hydraulic Compatibility
A hydraulic auger must be matched to the excavator's auxiliary hydraulic system.
Before installing an attachment, verify the required hydraulic flow, operating pressure, mounting system, and other compatibility specifications. An attachment that physically fits the machine may not necessarily be hydraulically compatible.
3. Drilling Without Checking for Underground Utilities
Never assume that an area is safe to dig simply because no utility lines are visible.
Before drilling, identify and locate underground utilities according to applicable local procedures and requirements. This is especially important around residential properties and developed areas.
4. Drilling at an Angle
Poor machine positioning can cause the auger to enter the ground at an angle.
Angled holes can make it difficult to install posts correctly and may affect the appearance and alignment of the finished fence. Take time to position the excavator and auger correctly before starting each hole.
5. Skipping Daily Attachment Inspection
Inspect the auger and hydraulic system before use.
Check for worn or damaged cutting teeth, loose mounting hardware, damaged hydraulic hoses, leaking connections, and other signs of wear. Regular inspections can help maintain drilling performance and reduce avoidable equipment and safety issues.


